Decorate and label cake and cookies
The birthday cake is ready, only "Happy Birthday" is still on it?
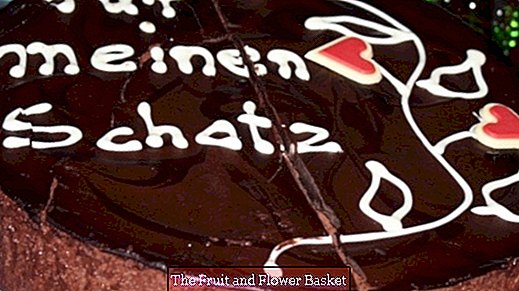
That's how it's done
1. In a small bowl of powdered sugar dropwise (!) With water, but better with milk or lemon juice, mix, stir well, the pulp should be relatively viscous, like honey.
2. Coloring: This is best done with the food colors in the 4 small tubes (yellow, blue, red, green). They are available in supermarkets (not Aldi etc.) for about 3 euros. The investment is worth it, the things last forever. For different colors, distribute the base material on a large number of bowls and stir with very little (small drops are enough!) Food coloring. By mixing, e.g. Make purple. Cocoa works best for Braun.
3. Decorate: Now you fill the stuff with a spoon in the corner of a freezer bag and cut with scissors from the top (not too much). Then you can start decorating. A tip: I would first practice lettering on the sideboard and write in cursive, because when settling it drips sometimes. And basically, the thinner the mass, the faster you have to write and the sooner it drips.
4. Drying: On the surface, the font dries pretty fast, if you still want to make beads or something - hurry! And: do not breathe.
American Frosting for complete lubrication: Your guests will be thrilled: stir in a few tablespoons of cream cheese in the base material. Tastes saulecker as a font on otherwise rather boring cake (for example, a simple chocolate cake)


